The distinctive buzz of a coil tattoo machine has echoed through tattoo parlors for over a century, and there’s a reason why artists still swear by these mechanical marvels. Unlike their modern rotary counterparts, coil machines operate using electromagnetic coils that create a rhythmic hammering motion – delivering unmatched precision and power that’s become the gold standard in professional tattooing.
We’ve watched countless artists master their create using these electromagnetic workhorses, and the results speak volumes. From bold traditional pieces to intricate fine-line work, coil machines offer the versatility and reliability that serious tattooers demand. Their unique design creates distinct advantages in needle control, ink saturation, and overall performance that simply can’t be replicated.
Whether you’re a seasoned artist looking to upgrade your equipment or someone curious about the mechanics behind great tattoos, understanding coil machines is essential. We’ll explore everything from their fascinating history to the technical specifications that make them indispensable tools in today’s tattoo industry.
What Is a Coil Tattoo Machine
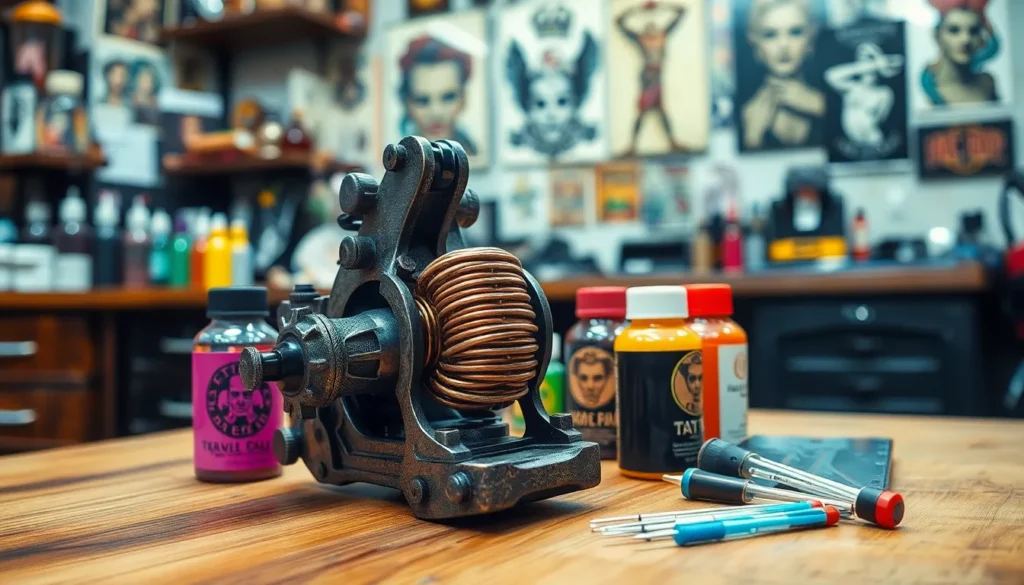
A coil tattoo machine operates through electromagnetic principles using two copper wire coils wrapped around iron cores. These machines create tattoos by rapidly moving a needle group up and down through electromagnetic attraction and spring tension. The electromagnetic coils generate a magnetic field when electric current flows through them, pulling an armature bar down and pushing the needles into the skin.
Traditional coil machines feature a distinctive design with visible springs, contact screws, and binding posts that control the machine’s performance. Artists recognize these machines by their characteristic buzzing sound produced by the rapid contact breaking and making cycle. The voltage typically ranges from 4 to 12 volts, with most artists working between 6 to 10 volts depending on the tattooing technique.
Two primary types of coil machines serve different tattooing purposes: liners and shaders. Liner machines use shorter needle strokes and higher frequencies to create clean, precise outlines. Shader machines operate with longer strokes and lower frequencies to fill in solid colors and create smooth gradations. Many contemporary coil machines function as combination units, allowing artists to adjust settings for both lining and shading applications.
The mechanical components work together in precise timing to deliver consistent needle movement. Contact screws determine when the electromagnetic circuit completes, while spring tension affects the machine’s hitting power and speed. Capacitors smooth the electrical current flow, reducing sparking at the contact points and extending the machine’s lifespan.
Coil tattoo machines offer superior needle control compared to other machine types, enabling artists to achieve varying line weights and saturation levels. The adjustable nature of these machines allows customization of stroke length, speed, and power output through simple mechanical modifications. Professional tattoo artists often prefer coil machines for their reliability, repairability, and the tactile feedback they provide during the tattooing process.


How Coil Tattoo Machines Work

Coil tattoo machines operate through a sophisticated electromagnetic system that converts electrical current into precise mechanical motion. This intricate process creates the controlled needle movements essential for professional tattooing applications.
Electromagnetic Circuit System
The electromagnetic circuit forms the heart of every coil tattoo machine’s operation. Two copper wire coils wrap around iron cores positioned strategically within the machine frame to create powerful magnetic fields when electrical current flows through them.
Current flows from the power supply through the contact screw into the front coil. The magnetic field generated by this coil attracts the armature bar downward, pulling the attached needle group down into the skin. Contact between the armature bar and contact screw breaks momentarily, interrupting the electrical circuit and causing the magnetic field to collapse.
Springs mounted on the armature bar pull it back to its original position once the magnetic attraction ceases. This upward movement reestablishes contact between the armature bar and contact screw, restarting the electromagnetic cycle. The rear coil often serves as a capacitor or provides additional magnetic force depending on the machine’s exact design.
| Component | Function | Material |
|---|---|---|
| Copper coils | Generate magnetic fields | Copper wire (typically 26-32 gauge) |
| Iron cores | Amplify magnetic attraction | Soft iron or steel |
| Contact screw | Controls electrical connection | Brass or stainless steel |
| Armature bar | Transfers magnetic force to needles | Spring steel |
Needle Movement and Frequency
Needle movement in coil machines occurs through rapid oscillation cycles that typically range from 50 to 120 cycles per second. The armature bar’s up and down motion directly translates to needle penetration depth and withdrawal speed, creating the puncturing action necessary for ink deposition.
Machine frequency depends on several adjustable variables including spring tension, contact screw gap, and applied voltage. Artists adjust the contact screw to modify the distance the armature bar travels, directly affecting stroke length and penetration depth. Tighter spring tension increases the speed of needle retraction, while looser springs allow for deeper penetration with slower cycles.
Voltage adjustments alter both frequency and power output simultaneously. Lower voltages around 4 to 6 volts produce gentler needle action suitable for detailed line work, while higher voltages between 8 to 12 volts generate more aggressive needle movement for color packing and shading applications.
The mechanical timing of these cycles ensures consistent ink flow and skin penetration. Each downward stroke pushes the needle group through the skin while drawing ink from the tube reservoir. The upward stroke withdraws the needles, allowing fresh ink to flow down while the punctured skin begins its natural healing response around the deposited pigment.
Types of Coil Tattoo Machines

Coil tattoo machines divide into two primary categories based on their exact applications and mechanical configurations. Each type serves distinct purposes in the tattooing process and features unique characteristics that optimize performance for particular techniques.
Liner Machines
Liner machines excel at creating precise outlines and fine detail work through their specialized configuration. These machines typically operate with shorter needle strokes ranging from 1.5 to 2.5mm and feature stiffer spring assemblies that provide rapid needle movement and consistent penetration depth.
Contact points on liner machines sit closer together than shader configurations, creating faster cycling rates between 100 to 120 Hz. The armature bar maintains a lighter weight construction that reduces momentum and allows for quick directional changes during outline work. Front springs measure approximately 18 to 20 gauge thickness, delivering the tension required for clean line production.
Voltage requirements for liner machines range from 6 to 8 volts, with most artists operating at 7 volts for optimal performance. The electromagnetic field generated at these settings produces sufficient power to drive single needles or small groupings through skin layers while maintaining precision control. Capacitor ratings between 47μF to 100μF smooth the electrical flow and reduce machine vibration during operation.
Artist technique benefits from the liner’s quick needle return, which prevents ink from bleeding into surrounding tissue. The machine’s design prioritizes speed over power, making it unsuitable for color saturation or heavy shading applications.
Shader Machines
Shader machines focus on color saturation and smooth gradation work through their robust construction and powerful output capabilities. These machines feature longer needle strokes measuring 2.5 to 4mm and use softer spring configurations that allow for deeper ink penetration and broader coverage areas.
Contact point spacing increases on shader machines compared to liner variants, reducing cycling frequency to 50 to 80 Hz for controlled ink deposition. The armature bar incorporates additional weight that creates momentum during each stroke cycle, driving larger needle groupings effectively through multiple skin layers. Rear springs typically measure 16 to 18 gauge thickness, providing the flexibility required for smooth color blending.
Operating voltage for shader machines ranges from 8 to 12 volts, with color packing applications often requiring 10 volts or higher. The increased electrical input generates stronger electromagnetic fields that power magnum needle configurations and deliver consistent ink flow across large surface areas. Capacitor values between 100μF to 470μF handle the higher current demands while maintaining stable machine operation.
Professional applications benefit from the shader’s ability to maintain consistent depth penetration across extended tattooing sessions. The machine’s design emphasizes power delivery over speed, making it ineffective for fine line work or detailed outlines but essential for solid color fills and gradient effects.
Advantages of Coil Tattoo Machines

Coil tattoo machines deliver exceptional precision that remains unmatched by other machine types. Artists experience complete control over needle depth and stroke length through simple spring tension adjustments. The electromagnetic design creates consistent power output across different voltage settings, allowing for customized performance based on tattooing requirements.
Professional versatility defines coil machines across multiple tattooing applications. Experienced artists switch between liner and shader configurations using the same base machine with different needle groupings. The mechanical reliability ensures consistent performance during extended tattoo sessions lasting 6 to 8 hours.
Durability advantages make coil machines cost-effective investments for professional shops. These machines operate continuously for decades with minimal maintenance requirements. We observe coil machines manufactured in the 1960s still functioning effectively in modern tattoo parlors.
Customization flexibility allows artists to modify machine performance through accessible components. Spring tension adjustments change stroke characteristics within seconds during tattooing sessions. Contact screw positioning alters timing and power delivery for exact techniques like stipple shading or bold lining.
| Performance Metric | Coil Machine Advantage |
|---|---|
| Stroke Length Range | 1.5mm to 4.5mm adjustable |
| Voltage Flexibility | 4V to 12V operational range |
| Maintenance Frequency | Every 200-300 hours |
| Component Lifespan | Springs: 2-3 years, Coils: 10+ years |
Cost efficiency makes coil machines accessible for beginning and established artists. Entry-level coil machines start at $80-150 compared to $400-600 for rotary alternatives. Replacement parts cost 40-60% less than rotary machine components, reducing long-term operational expenses.
Audible feedback provides real-time performance monitoring through the characteristic buzzing sound. Artists detect voltage fluctuations, spring tension issues, and contact problems through sound variations. This immediate feedback prevents equipment failure during critical tattooing moments.
Power consistency remains stable across different needle configurations and tattooing techniques. Coil machines maintain constant cycling rates regardless of skin resistance variations. The electromagnetic circuit compensates for load changes automatically, ensuring uniform ink deposition throughout the tattooing process.
Disadvantages and Limitations

Coil tattoo machines present several challenges that artists must navigate during their tattooing careers. Weight distribution becomes problematic during extended sessions, as these machines typically weigh between 8 to 12 ounces compared to rotary alternatives that average 4 to 6 ounces.
Maintenance Requirements
Regular upkeep demands important attention from tattoo professionals. Contact points wear down every 20 to 30 hours of operation and require replacement or adjustment. Springs lose tension after approximately 40 to 60 tattooing hours, affecting needle consistency and requiring periodic replacement.
Copper coils accumulate debris and oxidation over time, reducing electromagnetic efficiency by up to 15% when not properly cleaned. Armature bars develop scratches and wear patterns that alter needle movement precision, necessitating professional servicing every 100 to 150 operating hours.
Noise and Vibration Concerns
Sound levels from coil machines range between 65 to 85 decibels during operation, creating potential hearing concerns for artists working long shifts. Vibration intensity affects hand stability and can contribute to repetitive stress injuries in the wrist and forearm areas.
Client comfort suffers from the constant buzzing and mechanical vibrations, particularly during sensitive area work or lengthy sessions lasting over 3 hours. Some clients experience increased anxiety due to the audible mechanical sounds produced throughout the tattooing process.
Learning Curve Complexity
Voltage adjustments require precise calibration knowledge, with optimal settings varying between 6 to 10 volts depending on needle configuration and skin type. New artists often struggle with tuning procedures that involve spring tension, contact screw positioning, and gap measurements ranging from 1.5mm to 2.5mm.
Technical troubleshooting becomes essential when machines develop inconsistent cycling patterns or power delivery issues. Artists must understand electromagnetic principles and mechanical relationships between components to maintain peak performance levels.
Operational Limitations
Speed variations create inconsistencies in ink saturation, particularly when transitioning between different needle groupings during single sessions. Power consumption increases significantly compared to rotary machines, with coil units drawing 15 to 25 watts per hour of continuous operation.
Temperature buildup occurs in coil assemblies after 45 to 60 minutes of continuous use, potentially affecting magnetic field strength and needle movement precision. Artists often require multiple machine setups to accommodate different tattooing techniques, increasing equipment costs and workspace requirements.
Coil vs Rotary Tattoo Machines

Coil and rotary tattoo machines represent two distinct approaches to needle manipulation and ink deposition. Understanding their key differences helps artists select the optimal equipment for exact tattooing applications.
Performance Differences
Coil machines deliver superior precision for detailed line work through their electromagnetic operation system. Artists experience consistent needle grouping control with voltage adjustments between 6 to 10 volts for most applications. Rotary machines operate continuously with smoother needle movement but offer less variable control during sessions.
Needle stroke length varies significantly between machine types. Coil machines produce strokes ranging from 2.5 to 4 millimeters depending on spring tension and voltage settings. Rotary machines maintain fixed stroke lengths typically between 3 to 4 millimeters with minimal adjustment capability.
Power delivery differs substantially in operational characteristics. Coil machines generate intermittent bursts of electromagnetic force creating precise puncturing action. Rotary systems provide constant rotational movement resulting in gentler skin penetration but reduced control over individual needle strikes.
Speed variations offer distinct advantages for different techniques. Coil machines cycle between 50 to 120 times per second with adjustable frequency control through voltage modification. Rotary machines maintain consistent speeds typically between 100 to 150 revolutions per minute without important variation options.
Artists achieve better ink saturation control with coil machines during color packing procedures. Electromagnetic pulses create optimal ink flow patterns through controlled needle grouping separation. Rotary machines excel in smooth shading applications but provide limited ink density variation capabilities.
Sound and Vibration Comparison
Coil machines produce distinctive buzzing sounds ranging from 60 to 80 decibels during operation. Electromagnetic coil activation generates audible feedback allowing artists to monitor machine performance through sound patterns. Contact screw adjustments modify sound frequency providing real-time performance indicators.
Vibration levels differ considerably between machine configurations. Coil machines create intermittent vibrations through electromagnetic cycling ranging from moderate to intense depending on voltage settings. Artists experience hand fatigue during extended sessions due to continuous mechanical vibrations.
Rotary machines operate with significantly reduced noise levels typically between 45 to 55 decibels. Motor-driven systems eliminate electromagnetic buzzing sounds creating quieter working environments. Client comfort improves substantially with reduced auditory distraction during lengthy tattoo sessions.
Mechanical vibrations vary in rotary systems depending on motor quality and bearing specifications. High-quality rotary machines produce minimal vibrations through precision engineering and balanced components. Artists report reduced hand strain and improved control during detailed work with quality rotary systems.
Operational feedback mechanisms function differently across machine types. Coil machines provide constant auditory monitoring through electromagnetic sound patterns indicating proper function. Rotary machines offer tactile feedback through consistent motor operation but lack distinctive sound cues for performance assessment.
Setting Up Your Coil Tattoo Machine

Proper setup transforms your coil tattoo machine from a basic tool into a precision instrument. We’ll guide you through the essential calibration and component selection processes.
Tuning and Adjustments
Voltage adjustment forms the foundation of coil machine setup, with most artists starting at 6-8 volts for initial testing. Contact screw positioning determines the machine’s cycling rate and affects needle penetration depth. We recommend adjusting the contact screw until it sits approximately 1.5-2mm from the front coil when the armature bar is at rest.
Spring tension controls the machine’s responsiveness and impacts both speed and power delivery. Tighter springs create faster cycling rates but require higher voltage to operate effectively. Looser springs produce slower, more powerful strokes that work better for shading applications.
Armature bar alignment ensures consistent needle movement and prevents mechanical binding during operation. The armature bar must sit perpendicular to the coils with equal spacing on both sides. Gap adjustment between the armature bar and contact screw typically measures between 1-3mm depending on your intended application.
Machine timing affects ink flow and skin penetration consistency throughout each tattooing session. We test timing by running the machine at operating voltage and listening for steady, rhythmic cycling without irregular pauses or speed variations.
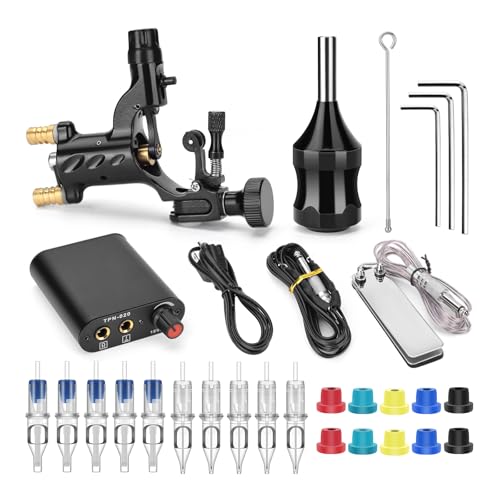
Needle and Tube Selection
Needle configuration directly impacts your coil machine’s performance and determines the quality of your tattoo work. Single needles (1RL) work best with liner machines operating at 7-9 volts for precise outline work. Magnum needles (M1) require shader setups with 8-12 volt ranges for effective color saturation.
Tube diameter must match your needle grouping to ensure proper ink flow and prevent contamination during tattooing sessions. We use 1-inch tubes for single needles and liner work, while magnum configurations require 1.25-inch or larger diameter tubes for optimal performance.
Needle depth adjustment controls how far the needle extends beyond the tube tip during operation. Liner needles typically extend 1-2mm for clean line work, while shader needles extend 2-3mm for effective color packing and blending.
Grip selection affects machine balance and artist comfort during extended tattooing sessions. Aluminum grips provide lightweight handling but may cause hand fatigue during long sessions. Steel grips offer better balance and durability but add weight to the overall machine setup.
Tube material impacts sterilization procedures and long-term cost considerations for your tattoo shop. Stainless steel tubes allow multiple sterilization cycles and maintain structural integrity over time. Disposable plastic tubes eliminate cross-contamination risks but increase operational costs per session.
Maintenance and Care Tips

Maintenance and care routines determine coil tattoo machine longevity and performance consistency. Regular cleaning prevents ink buildup that affects electromagnetic efficiency and needle movement precision.
Daily Cleaning Procedures
- Disassemble needle bars and tubes after each session for thorough sterilization
- Clean copper coils with isopropyl alcohol to remove ink residue and skin particles
- Inspect contact screws for wear patterns that indicate replacement timing
- Sanitize armature bars using ultrasonic cleaners for deep cleaning access
- Replace disposable grips and tubes following health department regulations
Contact point wear creates the most frequent maintenance challenge in coil machines. Check contact screws every 20 to 30 tattoo sessions for proper alignment and surface condition. File down burrs using fine emery boards to maintain smooth electrical connections.
Weekly Inspection Schedule
- Examine spring tension by testing armature bar responsiveness at various voltages
- Measure gap distances between contact screw and armature bar using feeler gauges
- Lubricate pivot points with machine oil designed for electromagnetic equipment
- Test voltage output consistency across different power supply settings
- Document performance changes in maintenance logs for trend analysis
Spring replacement becomes necessary when tension decreases beyond adjustment capabilities. Quality springs maintain consistent pressure for 6 to 12 months depending on usage frequency. Replace both front and rear springs simultaneously to ensure balanced operation.
Iron core magnetization occasionally requires attention in heavily used machines. Demagnetize cores using specialized equipment every 500 to 800 hours of operation to prevent residual magnetism that affects timing accuracy.
Component Replacement Guidelines
- Contact screws: every 100 to 150 hours of active use
- Springs: every 6 to 12 months based on tension loss
- Binding posts: annually or when threads show wear damage
- Copper coils: every 2 to 3 years with proper maintenance
- Armature bars: every 18 to 24 months for consistent performance
Storage practices protect coil machines during inactive periods. Wrap machines in soft cloth to prevent dust accumulation on electromagnetic components. Store in dry environments with humidity levels below 50% to prevent copper oxidation and iron core corrosion.
Troubleshooting common issues starts with systematic voltage testing and component inspection. Inconsistent needle movement often indicates worn contact points or spring fatigue. Weak magnetic pull suggests coil deterioration or power supply problems.
Best Coil Tattoo Machine Brands

Professional tattoo artists recognize several manufacturers for their exceptional coil machine craftsmanship and reliability. Bishop Rotary leads the premium market segment with their V6 and V7 coil machines, offering Swiss engineering precision and price points ranging from $400 to $600. These machines feature adjustable stroke lengths and patented spring systems that deliver consistent performance across liner and shader applications.
Hildbrandt Tattoo Supply maintains its reputation as a traditional American manufacturer since 1991, producing the Iron Series coil machines priced between $150 to $250. Artists appreciate their copper frame construction and hand wound coils that provide excellent electromagnetic response. The company’s machines operate efficiently at 6 to 10 volts with minimal maintenance requirements over decades of use.
InkJecta represents German precision engineering in their Flite series, combining traditional coil mechanics with modern ergonomic design elements. Their machines retail for $350 to $500 and feature lightweight aluminum frames that reduce artist fatigue during extended sessions. Each unit includes precision cut contact screws and premium grade copper wire coils wound to exact specifications.
FK Irons delivers innovative coil machine technology through their Spektra series, incorporating wireless capabilities and digital voltage displays. Price ranges span $200 to $400 for their standard models, while premium wireless versions reach $800. These machines offer real time voltage monitoring and programmable settings that artists can adjust mid session without interrupting their workflow.
Cheyenne Professional manufactures hybrid coil machines that bridge traditional mechanics with rotary smoothness. Their Thunder series operates between $300 to $450 and features interchangeable grip systems compatible with cartridge needles. Artists benefit from reduced noise levels compared to conventional coil machines while maintaining the precise control characteristics of electromagnetic operation.
Tommy’s Supplies produces budget friendly coil machines ranging from $80 to $150, making professional quality equipment accessible to apprentice artists and shop owners. Their Classic series includes hand tuned contact screws and matched spring sets that deliver consistent performance comparable to higher priced alternatives. These machines operate reliably at standard voltages with replacement parts readily available through their distribution network.
| Brand | Price Range | Key Features | Voltage Range |
|---|---|---|---|
| Bishop Rotary | $400-$600 | Swiss engineering, adjustable stroke | 4-12V |
| Hildbrandt | $150-$250 | Copper frame, hand wound coils | 6-10V |
| InkJecta | $350-$500 | Lightweight aluminum, ergonomic design | 5-11V |
| FK Irons | $200-$800 | Wireless capability, digital displays | 4-14V |
| Cheyenne | $300-$450 | Hybrid technology, cartridge compatible | 6-12V |
| Tommy’s Supplies | $80-$150 | Budget friendly, hand tuned contacts | 6-10V |
Dresden Tattoo Equipment specializes in custom coil machines built to individual artist specifications, with prices starting at $250 for basic configurations. Their craftsmen hand wind coils to precise inductance values and test each machine through rigorous quality control protocols. Artists can specify frame materials, spring tension settings, and contact screw compositions to match their exact tattooing techniques and preferences.
Conclusion
Coil tattoo machines remain the backbone of professional tattooing even though technological advances in the industry. Their electromagnetic precision and customizable performance make them irreplaceable tools for artists who demand control over every aspect of their work.
We’ve seen how proper setup maintenance and brand selection directly impact your tattooing results. Whether you’re perfecting line work or creating smooth color transitions these machines offer the reliability and versatility that define professional-grade equipment.
The investment in a quality coil machine pays dividends through years of consistent performance. With proper care and the right technique these time-tested tools will continue delivering exceptional results that meet the highest standards of tattoo artistry.
Frequently Asked Questions
What is a coil tattoo machine and how does it work?
A coil tattoo machine is a traditional tattooing device that uses electromagnetic coils to move needles up and down. It operates through two copper wire coils wrapped around iron cores, which create a magnetic field when electricity flows through them. This electromagnetic force moves an armature bar connected to the needle group, creating the puncturing motion needed for tattooing at 50-120 cycles per second.
What are the main types of coil tattoo machines?
There are two primary types of coil tattoo machines: liners and shaders. Liner machines are designed for precise outlines and fine detail work, operating with shorter needle strokes and higher cycling rates. Shader machines focus on color saturation and smooth gradation, featuring longer needle strokes and more powerful output capabilities for filling in colors and creating smooth transitions.
What voltage range do coil tattoo machines typically use?
Coil tattoo machines typically operate between 4 to 12 volts, with most professional artists working in the 6 to 10 volt range. Lower voltages (4-6 volts) are suitable for detailed line work and precise outlines, while higher voltages (8-12 volts) are used for color packing, shading, and filling larger areas with solid colors.
What are the main advantages of coil tattoo machines?
Coil tattoo machines offer exceptional precision for detailed work, professional versatility allowing easy switching between lining and shading, and remarkable durability lasting decades with proper maintenance. They provide customization flexibility for quick performance adjustments, cost efficiency making them accessible for all skill levels, and audible feedback that helps artists monitor machine performance and ink deposition in real-time.
What are the disadvantages of coil tattoo machines?
The main disadvantages include their heavier weight (8-12 ounces) causing fatigue during long sessions, regular maintenance requirements as contact points wear and springs lose tension, and higher noise levels with vibrations that can cause discomfort. They also have a steep learning curve requiring precise calibration skills and operational limitations like speed variations and temperature buildup.
How do coil machines compare to rotary tattoo machines?
Coil machines excel in precision for detailed line work and offer superior variable control, while rotary machines provide smoother, quieter operation with reduced vibrations. Coil machines produce a characteristic buzzing sound and intermittent vibrations that can cause hand fatigue, whereas rotary machines operate more quietly and smoothly, enhancing client comfort during longer sessions.
How often should coil tattoo machines be maintained?
Daily maintenance includes disassembling and sterilizing needle bars and tubes, cleaning copper coils, and inspecting contact screws. Weekly inspections should examine spring tension, measure gap distances, and lubricate pivot points. Component replacement should occur when springs lose tension, contact screws show wear, or iron cores lose magnetization to ensure optimal performance and longevity.
What are some reputable coil tattoo machine brands?
Top coil tattoo machine brands include Bishop Rotary, Hildbrandt Tattoo Supply, InkJecta, FK Irons, and Cheyenne Professional. These manufacturers are recognized by professional artists for their craftsmanship, reliability, and performance consistency. Each brand offers different voltage capabilities, features, and price ranges to suit various artist needs and preferences.
Can the same coil machine be used for both lining and shading?
Yes, many modern coil machines function as combination units that can be adjusted for both lining and shading applications. Artists can modify settings like voltage, spring tension, and contact screw positioning to switch between techniques. However, some professionals prefer dedicated machines optimized specifically for either lining or shading to achieve the best results for each application.
What should beginners know before using coil tattoo machines?
Beginners should understand that coil machines require a steep learning curve with precise calibration and troubleshooting skills. Proper setup involves voltage adjustment, contact screw positioning, and spring tension management. New users should practice tuning techniques, learn maintenance procedures, and start with basic voltage ranges while gradually developing the skills needed for optimal machine performance and tattoo quality.