Here is why I made this post. Shading in tattooing can feel scary for beginners. The tools, the grip, the pressure, and the way ink sits under skin can all confuse you. I want you to walk away with clear steps you can try right away. This guide shares 30 shading tips and ideas that are practical, doable, and beginner-friendly.
Who it’s for. If you are new to tattooing or you want to raise your shading game, this is for you. You care about clean lines, smooth fills, and steady progress. You want commands you can follow, not a long list of jargon. You’ll find tips you can apply on practice skin or a simple client piece.
What you’ll get. Here you’ll find a mix of techniques and routines. I cover basics like needle choices, pressure control, and how to layer tones. You’ll read about whip shading, feathering, stippling, cross-hatching, and soft gradient fills. There are practical drills and small project ideas you can try to build confidence.
How to use the tips. Start with a simple shape and one shading style at a time. Use practice skin or faux skin to feel the skin give under the needle. Pace yourself and build light to dark layers. Each tip is paired with a quick, concrete step you can copy in your setup.
Real talk about limits. Shading takes time and patience. Skin differs from person to person and from area to area. Expect some days that tone builds fast, and others where it needs more layers. The goal is smooth transitions, not heavy hand movements.
Next steps. Dive into the 30 ideas and pick a few to try this week. Track what works and what doesn’t, and adjust your grip, pressure, and speed. If you keep practicing, you will see depth and dimension grow in your work. Ready to start shading with confidence? Read on.
1. Understanding Tattoo Shading Techniques

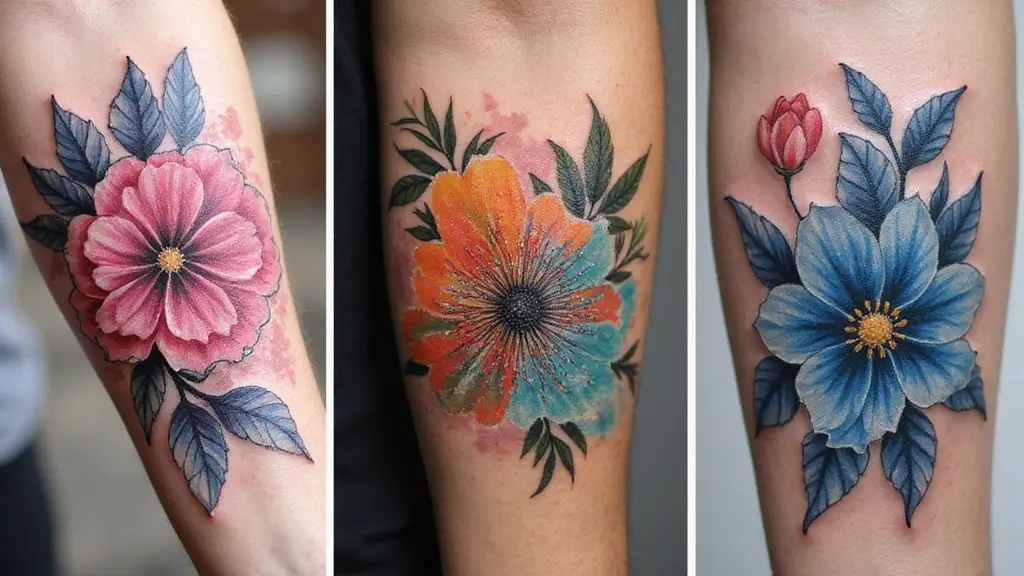
If you want shading that looks right, you need the basics clear first. You have three common tattoo shading styles to learn: whip shading, gradient shading, and stippling. Each one creates a different feel, so pick the look you want before you start.
– Whip shading uses quick, flicking strokes. It fades light to dark in a soft, natural way. Use it for gentle shadows and curved edges that should melt into the skin.
– Gradient shading offers a smooth color change. It is even and steady. Keep the hand light and the speed even to avoid harsh lines.
– Stippling builds a texture with tiny dots. Dense dots make dark spots, sparse dots stay light. This style works well for grain, skin texture, or vintage looks.
Here is why these matter. They give you control over depth, contrast, and mood in a design. Next, you need practice surfaces, not real skin, to test your technique safely.
– Practice on synthetic skin or ripe fruit.
– Start light. Build shade in thin passes.
– Always keep the needle at a steady depth and move with a calm rhythm.
– Clean the surface between passes to see your true shading.
Next steps: decide which technique fits your tattoo style, then schedule short practice sessions to build consistency. With time, your shading will read clearly and stay smooth on real skin.

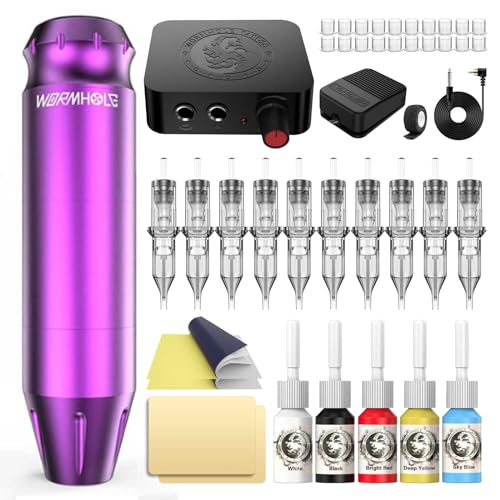

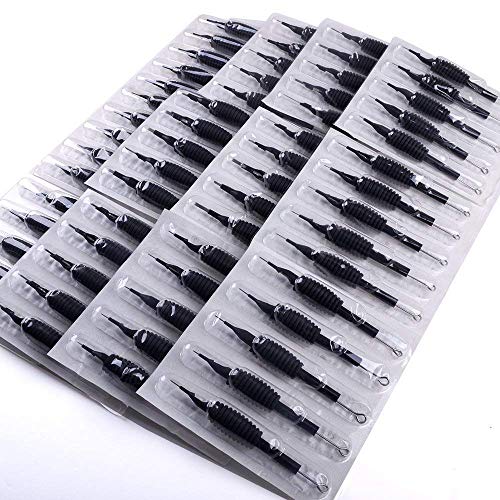
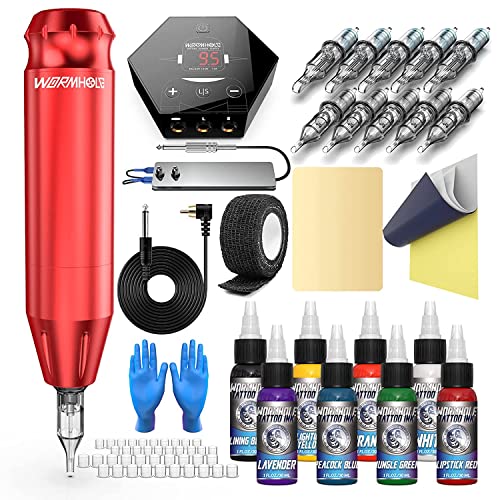
2. Choosing the Right Tattoo Needles

Choosing the Right Tattoo Needles for Shading
If shading looks uneven, your needle choice could be the culprit. Here is why your tools matter and how to pick them for clean, soft shading.
– For small areas, a round shader needle delivers soft edges and fuller coverage.
– For large patches, a magnum needle blends faster and creates smoother gradients.
– Try several sizes and configurations to find the fit that matches your style.
– Depth and machine speed shape the shade, so start shallow and move slowly.
Next steps: practice on safe practice skin. Feel the tiny tick as the needle touches the surface and watch how ink settles with each pass. Test both setups, round shader first, then magnum, for the same patch to compare results. Keep notes on what works: which combo gave the cleanest fade, and where you saw streaky areas. If you see skip or streaky areas, ease up on depth and slow the movement a touch. Stay mindful of your rhythm; a steady hand makes the shade look even. With time, you’ll map a simple path from light wash to fuller tone. Keep your work area clean and your gloves on. Your first fades will be soft, so build tone stroke by stroke. Repeat this with small changes to learn the best blend.


3. Using the Right Ink for Shading

Why the right shading ink helps you
You want smooth fades. The ink you choose fixes how clean your shadows look. Look for inks that blend well. They come in light, mid, and dark shades so you can travel from pale edges to deep shadows.
Where to start
Popular options like Intenze and Eternal are strong bets. They stay creamy when you work in layers. They mix nicely with other colors and stay true as you build your shading.
Do a patch test first
Test on synthetic skin before the real thing. Put a small drop and let it dry. Compare how it blends with nearby colors. If it spreads oddly or stiffens, skip that mix.
How to pick shades
Grab at least three tones: light, medium, dark. Use them for a clean gradient. Think warm and cool tones. A warm gray can feel different from a blue-gray in your piece.
Practical tips
Keep ink upright and use small amounts. Work neat, in even passes. Keep the surface taut so you don’t smear. Clean your tools and cap the bottles after use.
Next steps
Try a controlled shading drill on fake skin. Note how each shade behaves. Write down what works for your style. Keep testing and note results. Save your notes for the next shade choice.


4. Preparing Your Skin Canvas

You want a clean, steady canvas before you shade. A rough or oily skin surface makes ink sit weird and shadows blur. Start with a simple clean wash. Use soap and water, then pat dry with a fresh towel. Don’t apply lotion before you tattoo. Oils hide ink and push it away.
<Key prep steps
– Clean, dry skin with no lotion at all
– Degrease using a 70% alcohol wipe and let the area air dry
– Apply your stencil on dry skin and press to transfer the design
– Check that the lines line up. If needed, lift and reposition
– Visualize your shading path before you start
Here is why this matters. A well-prepped canvas helps shading stay precise. It also lowers the chance of skin irritation and infection. The stencil keeps you on track so you don’t drift off the design mid-stroke. A dry, clean surface lets the needle work evenly and the ink settle evenly.
Next steps. Keep the area calm during shading. Watch for redness or signs of irritation. If skin looks sore or you feel pain, pause the session and reassess. With proper prep, your shading will look cleaner and settle nicer on the skin.


5. The Importance of Lighting

Shading looks flat in bad light. You need bright, clean light to see tones and lines. Natural light helps, but it’s not always reliable. In a studio, aim for light that is bright and even.
Natural light is the best guide for color and shade. It shows true tones and gentle shadows. When you work indoors, pick a setup that stays steady all day. Consistent light helps you judge shading accurately.
Lighting tips for shading
Here is how to set up for shading work:
– Use bright, even lighting with no harsh shadows. Look at your area from different angles to confirm evenness.
– Keep glare off the skin. Move your head or the light until a reflection no longer washes out details.
– Add a lightbox or desk lamp with adjustable brightness. Dim it to see soft gradients, raise it for crisp lines.
– Check skin tones at eye level and from the side. Angled light reveals how shading changes with curves.
– Test on practice skin first. Adjust distance, angle, and color temperature before you touch real skin.
Next steps: run a quick shading pass on a practice sheet to confirm your setup works.
With the right light, you spot flaws fast and improve faster. Keep practicing daily.


6. Mastering the Angle of the Machine

If you want smooth shading, the angle you hold the tattoo machine with matters. A small tilt often makes ink sit evenly and glide under the needle. Here is why: a steady angle helps ink flow into the skin instead of piling up on top.
Next steps follow a simple plan:
– Start with a 45-degree tilt for flat areas. This gives balanced color and clean edges.
– Adjust for curves. Ease the needle to about 30–40 degrees on rounded shapes, and push toward 50–60 degrees for sharp corners. Test on practice skin first.
– Move with the body, not just the wrist. Let your forearm lead the motion and keep strokes short and even.
– Keep a steady hand. Lightly rest your hand on the surface to stabilize it. Slow, controlled passes beat rushed lines.
– Practice on different surfaces. Real skin acts different from fake skin. Compare shading and note where you need to adjust the angle.
This skill grows with time. Your style will settle after you try patterns you like and repeat them. Remember, different machines and tips can shift the feel. Don’t chase a myth. Focus on control, consistency, and feel.
Practice weekly, review your shading, and adjust as you grow.


7. Creating Depth with Layers

Depth in shading comes from layers. You start light and add darker layers slowly. Each new layer helps color flow and keeps transitions smooth. Don’t rush this part. Patience shows in the final shadows and makes your tattoo read clearly.
– Step 1: Lay a soft base Begin with a thin wash of light gray or diluted ink. Use small, even strokes and keep the hand steady.
– Step 2: Build mid tones Add a mild shade over the base. Let the color blend where edges meet to avoid harsh lines.
– Step 3: Deepen the shadows Apply a darker tone where forms press in. Build slowly, placing the deepest shade only where it helps the shape.
– Step 4: Smooth the edges Feather the borders with soft strokes. Let each edge fade into the next value for a natural look.
– Step 5: Check and adjust Look from angles, compare sides, and tweak gaps. Small tweaks can sharpen volume and depth.
– Step 6: Practice first Test on practice skin or fruit before tattooing real skin. Feel the pressure, watch how ink settles, and learn the rhythm.
Here is why this works. Layered shading creates volume. It keeps jumps between tones tiny. That makes the tattoo breathe.
Next steps. Keep a simple routine, note what works, and layer with care. Your shading will grow more confident with every session.
8. Watercolor Tattoo Effects

Watercolor Shading Tips
Watercolor tattoos give your art a soft, painted look. You see colors flow and blend, with edges that fade rather than end in a hard line. To get this effect, you must work in light layers and dilute the ink.
Here is why this approach works. A pale base lets colors breathe. Layering adds depth without heavy borders. Blending colors while the skin is still soft helps you avoid chunky patches.
– Use diluted inks. Add water or a thinner mix to create a wash you can layer.
– Build in stages. Start with a light color wash, then add more color in later passes.
– Soften edges. Let colors bleed into nearby spaces to mimic watercolor art.
– Keep a small palette. Choose 2–4 colors that blend well.
– Test before you tattoo. Practice on synthetic skin or fruit, and note your mixes.
Next steps. Plan your design with big shapes first. Choose a palette that matches skin tone. Practice color transitions, not solid blocks. Expect some fading over time and plan shading accordingly.
This technique shines in larger areas like sleeves or back pieces, where soft color tells a story. And remember, clean lines still help keep your design readable.
9. Using a Blender or Shader Cap

Using a Blender or Shader Cap
– What it does: A blender cap sits on the shading needle tip and lets ink spread a bit.
– Why it helps: It creates gentler transitions between tones so you avoid hard lines.
– How to pick one: Start with three sizes.
– A small cap for light fades, a medium cap for general shading, and a large cap for wide, soft fades.
– Matching with needles: Pair a round shader or magnum with the blender cap.
– The combo spreads ink more evenly and reduces bold edges.
– Test plan: Practice on skin-like material with the same pigment. Try each cap and compare edge softness, fade, and evenness.
– How to test properly: Keep a steady light touch and move slowly. Watch how the edge blurs as you glide.
– If lines pop up, switch cap size or distance.
– Practical tips: Use shading needle groups that spread ink evenly, not a straight liner.
– Your grip and pressure matter.
– Quick workflow: choose a cap, set a light fade, practice a 2-inch gradient, then move to a real design.
– Final note: Note what tips your style and keep refining your setup.
– Practice often.
Unlock the artistry of tattooing for beginners shading! A blender cap can be your best friend, ensuring smooth transitions and eliminating harsh lines. Size matters—choose the right cap for a flawless finish!
| Technique | Description | Tips |
|---|---|---|
| Whip Shading | Uses quick, flicking strokes for soft shadows. | Practice on synthetic skin to master the technique. |
| Gradient Shading | Offers a smooth color change with even tones. | Keep hand light and speed even to avoid harsh lines. |
| Stippling | Creates texture with tiny dots for depth. | Vary dot density for different effects. |
| Blender Cap | Sits on shading needle to create gentler transitions. | Test different sizes for desired fade effects. |
| Watercolor Effects | Soft, painted look with blended colors. | Use diluted inks and practice layering. |
| Layering Technique | Builds depth through multiple light layers. | Start with a light wash and gradually deepen tones. |
| Skin Preparation | Clean, dry skin is essential for good shading. | Use alcohol wipes and apply stencils carefully. |
10. Learning from Experienced Artists

– Where to find a mentor You want real shading tips from people who do it every day. Look for workshops, online courses, and tattoo expos. You’ll see live demos and get quick feedback.
– What to watch in a session Watch how they grip the gun, apply light pressure, and move with rhythm. Notice the gray wash build from light to dark. See how they fix slips with calm touches. Keep your eyes on how they pace the session.
– How to use what you learn Take quick notes after each demo. Try the same moves on practice skin. Start small, then grow to simple designs. Practice on synthetic skin to feel ink flow. Plan your next practice in advance.
– Smart questions to ask Ask about shading style, needle options, and depth. Ask how they mix gray tones for different skin tones. Ask about safety and sterilization.
– Actions you can take now Do 15 minutes of shading drills after a lesson. If allowed, record a short clip and review it. Add one tip each week to your toolkit.
– Materials and setting Bring a notebook or phone to capture notes. Check you have permission to record. Notice how the space stays clean and tools stay organized. This helps you copy good habits.


11. Utilizing Color Theory

Color makes a tattoo feel alive. It adds depth and mood. You can plan colors to guide shading and keep the design clear. This is color theory for beginners. You will learn to keep designs readable from start to finish.
Color pairing
Two ideas guide your choices. Complementary colors push apart for bright contrast. Analogous colors sit close for a smooth, harmonious look. Warm colors pull forward; cool colors recede. Smart palettes avoid clashing hues that fight each other.
– Test palettes on practice skin before you ink.
– Pick one dominant color and one accent to keep the design readable.
– Make sure your shading uses value, not just hue.
– Think about the person’s skin tone; the same color reads differently on every skin.
Skin tone and lighting
On darker skin, bright colors pop more if they are high in value. On lighter skin, avoid pale tints that vanish. Observe how the sun and indoor light change colors. Practice with photos of your work on different skin tones.
Practical shading steps
Plan your palette first. Map light and shadow areas on the design. Lighten edges for a gentle glow. Darken key shadows to add depth.
Color is the heartbeat of your tattoo. Embrace color theory to create depth and clarity, making your designs resonate with life!


12. Practicing on Synthetic Skin

If you are new to tattoo shading, start with synthetic skin. It feels close to real skin, but you can take your time. You learn without a client on the line. Here is why this practice saves you trouble.
– Materials: pick a good sheet of synthetic skin that mimics real texture. Grab a few ink shades, a simple shader needle, and a small power unit. Have clean wipes and a safe cleaner ready.
– Setup: wash your hands, wear gloves, and clean your work area. Set the machine to a slow pace. Practice with a light touch and a steady hand. Start on tiny patches first.
– Techniques to try: a light gray wash to build layers, cross-hatching, and gentle gradients. Add stippling for texture. Keep lines soft and even. Pause to check tone across the patch.
– Progress and tips: look for even tone, no big blotches, and smooth edges. If ink pools, lift and reset your pressure. Compare different spots to stay consistent. Keep a simple notebook of what worked and what felt off.
– Next steps: once you feel steady, try larger shapes and different ink types. Remember, real skin behaves differently, so plan a gradual move to live work.
13. Avoiding Overworking the Skin

Shading is where beginners push too hard. Pressing too long on one spot can scar the skin or blow out edges. You want a smooth, even look. Work softly and give the skin a chance to breathe. If the skin turns very red or swells, stop. Read the skin and slow down.
The skin tells you when to ease up. A quick blink of redness that fades is ok. If the area stays inflamed, rest and reset your approach. After a short break, resume with lighter strokes. The goal is clean shading that heals well.
– Light passes first. Build the shade in thin layers, not in one deep sweep.
– Shade small sections. Break the design into tiny areas and finish each.
– Keep depth steady. Hold the needle at a calm, even depth to avoid blowouts.
– Pause when needed. If you feel heat or see angry skin, take a quick break.
– Keep the surface smooth. Use the right ointment and tools, and wipe between moves to reduce drag.
– Test your gradient. Start light and add darker tones in steps.
With patience, you’ll get shading that looks even and ages well. Take time to check your work from several angles, often after a break.

14. Cleaning the Tattoo Area

Your shading will look better when the area stays clean. Hygiene protects you and your client. Here is how to keep the tattoo area spotless every session.
– Prep your workspace
Before you begin, wipe down the table, machine stand, and lamp with a disinfectant wipe. Put a fresh barrier sheet on the tray. A tidy base stops ink from spreading and lowers infection risk.
– Keep sterile gear ready
Open single-use needles and sleeves where you can see them. Lay everything on a clean, dedicated tray. Do not touch sterile parts with dirty hands.
– Hands, gloves, and barriers
Wash hands well. Put on clean gloves. Change them if they tear or when you switch tasks. Keep barrier films on ink cups and trays.
– Skin prep and on-the-fly hygiene
Wipe the skin with an approved antiseptic before shading. Have a fresh wipe handy for every pass. Clean the machine grips and housing as you go. Use new wipes for each area you shade.
– Clean up and aftercare
Toss used wipes immediately. Reseal ink cups and keep your station free of loose items. After the session, give the area another wipe down and store tools so they stay sterile.
Next steps: review your setup, refine your wipe routine, and keep a quick clean list for every session.

15. Understanding Skin Types

Understanding skin types and shading
You must plan shading by the skin you work on. Skin type changes how ink sits. Oily skin can push pigment. Dry skin can grip ink unevenly. Sensitive skin can react to products. Knowing this helps you get a smooth look.
– Oily skin: Keep the area dry between passes. Use light, slow shading. A slightly diluted ink can control spread. Take short breaks to let the surface settle.
– Dry skin: Hydrate before you start. Shade in light layers and build slowly. Be gentle to avoid deep lines.
– Sensitive skin: Do a patch test first. Use mild products and fewer passes. Stop if you see redness or itching.
– Combination skin: Adapt by zone. Shade oily areas with careful fades and treat dry zones with gentle layering.
Before you begin
Ask these about skincare:
– What routine do they follow?
– Do they exfoliate or use strong moisturizers?
– Any meds or skin conditions?
– Any past reactions to pigments?
Practical steps you can use now
– Start with clean, dry skin.
– Do a small patch test.
– Plan light passes first, then add depth.
– Wipe often and let the skin rest.
During the session
Move steadily. If ink pools, slow down and wipe. If uptake is uneven, switch to a softer fade.
Aftercare
Keep skin clean and moisturize lightly. Avoid sun for a bit.
Next steps
Want more shading tips for different skin tones? I can add more ideas.
Extra note
Next steps for mixed skin: watch shiny zones and adjust depth with lighter passes there. Keep notes about what works. You can reuse this plan with adjustments.
16. Shading Styles for Tattoos

– Shading Styles You Can Explore You want shading that fits your design and your client. Start by knowing your options. Then practice to see which styles you enjoy and which ones clients love.
– Black and gray shading: This style uses different gray tones instead of color. Build your gradient from light to dark. Start with thin lines, then layer to deepen shadows. Practice on skin charts to keep the blends smooth.
– Color watercolor shading: Colors bloom softly as if painted with water. Don’t flood the skin with color at once. Build translucent layers and let colors mix in the right places. Use delicate washes for a gentle transition.
– Japanese style shading: You get quiet gradients and fine line work. Use light ink and small tilts of the needle for soft shading. Add thin cross‑hatching to imply texture without heavy blocks.
– Tribal shading: Expect bold black fills with crisp edges. Plan negative space so the design breathes. Leave clean gaps where the skin should show through.
– Geometric shading: Think clean lines and even dots. Shield curves with precise shading blocks. Use dot work or hatch lines to keep a neat, modern look.
– Stippling and soft realism: Tiny dots create gentle shading. Vary dot density to age the light and shade. It takes time, but the result is smooth, lifelike depth.
Next steps: test each style on practice skin, compare how they feel to you and your clients, and keep a simple shade guide as you go.

17. Tattoo Design Ideas for Beginners

If you want shading that looks real, start with designs easy to shade. You learn depth by using simple shapes and clear light and dark areas.
– Flowers: soft petals invite blending. Practice gradual gradients from light to mid and then dark.
– Geometric shapes: circles, squares, triangles keep lines clean. They help you shade evenly and avoid messy edges.
– Mandalas: repeating patterns train tone control across parts.
– Leaves and small animals: add texture without crowded lines. Test fine shading in tight spaces.
Here is why: look for pieces that show a clear light source. Save pieces you like and study how the artist places highlights.
Create your own designs. Sketch a tiny flower, then shade each area.
Next steps: use a light transfer line, then build tone in layers. Start with a light gray, add a middle shade, and finish with a darker edge.
Materials and prep: choose a simple needle or mag for sketching, keep your stencil clean, and work in a calm space.
Shading improves with short, steady practice. Set small goals, track progress, and you will see real gains.
Keep a small sketchbook and shade tiny samples every week. Soon you will see real progress in your shading skills.
Shading is an art! Start with simple designs like flowers and geometric shapes to master depth and tone. Remember, every great tattoo begins with a solid foundation in shading techniques.
18. Keeping a Sketchbook

A sketchbook can be your best tool as you learn shading. Here is why you should keep one.
You can practice designs without a client. You call the pace, the ideas, and the level of shade. It lets you test many looks and see how light and shadow play together. You start to spot your own voice in the drawings. Make it a habit to sketch a little every day.
Let’s break it down.
Keep the book close so you jot ideas fast.
How to use it daily
– Set aside 15 minutes for a quick session. You will grow faster if you do it every day.
– Start with tiny thumbnails. Quick circles, lines, and shapes map ideas for a real tattoo.
– Try different shading styles on scraps. Practice smooth gradients, cross hatching, stipple, or soft feathering.
– Label each page with notes: what you changed, what felt off, and what you would try next.
Tools and tips
– Use simple pencils, ink pens, or markers so you can switch styles quickly.
– Keep a dedicated page for tone practice. Create a 1 to 5 scale from white to black.
– Save scans or photos of your work. Review them and plan the next pass.
What you gain
– You build ideas you can turn into flash sheets.
– You gain confidence to try new shading methods in real tattoos.
Next steps: start a daily sketch habit this week. You will see small changes quickly. Treat every page as a learning file. Keep it steady.
19. Observing Nature for Inspiration

Nature is your shading coach. Light and shadow melt onto every surface. You can read those tones and bring them into tattoo shading.
Why observe nature helps you.
– Watch how sunlight slides across a leaf, a feather, or a stone.
– See where shadows fall on curved edges.
– Notice texture changes from rough bark to smooth water.
How to practice with simple steps.
1) Take a short outdoor walk. Look for three scenes with strong light and dark areas.
2) Snap photos or make quick sketches. Return later to study them.
3) Note the darkest shadows and the brightest highlights. Write down the contrast you see.
From photo to skin translate it to your shading work.
– Turn a photo into a plan for your piece. Use a grayscale cheat sheet.
– In practice skin, start with light shading. Build midtones, then deepen shadows.
– Test pressure on your tool. A lighter pass grows a soft gradient; a heavier pass adds depth.
What to watch for in real life and in studio.
– Texture matters. Rough surfaces create coarser grays; smooth ones stay lighter.
– Light angles change tone. Recheck your reference as light shifts.
Next steps: keep a nature notes book. Carry a small camera or phone, and review your notes before shading a design.
Practice daily and compare results. You will see subtle gains in continuity and depth. Keep notes and revise your plan.
20. Staying Calm and Focused

Staying calm while you shade makes the job easier. A clear mind leads to even lines and softer, smoother shading.
Here is a simple, practical plan you can use every session.
– Breathe and reset. Take a slow breath in, then exhale fully. Do this before you begin and between tougher areas to reset your pace.
– Prep your space. Set the lamp high and steady, so you see every value. Keep your chair comfy and the room warm enough that your hands stay loose.
– Visualize a plan. Look at the design and decide where shading starts. Think in light layers, not one heavy pass. This keeps your hand steady.
– Cut distractions. Silence your phone and tell others you need quiet for a while. A calm room helps your focus stay intact.
– Choose calm music. Pick soft instrumental tunes. The beat should guide your tempo, not rush you.
– Check your posture. Stand or sit with a relaxed spine. Keep wrists loose and shoulders down to avoid fatigue.
– Use short breaks. If you feel tense, pause for 20 to 30 seconds. Shake your hands and breathe before you continue.
– Warm up on practice skin. Do a quick sweep of light shading to set your rhythm. Then move to the real piece.
– Build in layers. Start with a faint tone, then add depth gradually. Consistent pressure keeps shading even.
Next steps. Apply this routine and watch your shading become steadier and cleaner.


21. Incorporating Client Input

Shading makes the tattoo feel alive. Client input keeps shading in line with their life and style.
– Ask what shading style they love and where depth feels right. Ask about textures they prefer, like smooth gradients or crisp lines.
– Gather references. Bring photos, run swatches on skin, and note how shade shifts with light.
– Explain lighting and healing. Show how depth can change from a pale wash to strong shadows as it heals.
– Create a shading map. Draw a simple plan with light, midtone, and shadow zones to guide the session.
– Choose techniques that fit the design. Discuss soft gradient, cross-hatching, and stippling as options you can mix.
– Check in during the session. Keep feedback quick and act on it by adjusting pressure, angle, or needle group.
– Plan aftercare and follow-up. Shading can soften as it heals; schedule a quick check after healing to tweak if needed.
To create tattoos that truly resonate, embrace your client’s vision. Their input on shading can transform a design from ordinary to extraordinary!

22. Using a Reference Image

If shading feels hard, a reference image can guide your hand. Pick photos or drawings that match the style you want. Keep them where you work. Let light, dark, and edge feel real on the page.
Here is why references help. They show how light falls and where shadows live. They reveal smooth blends or strong contrasts you aim for. Analyze what you see and write short notes. This builds a personal shade map you can reuse.
– Step 1: Choose a clear reference Look for images with clean light and clear dark areas. A simple portrait, leaf, or symbol can teach you shading and fade.
– Step 2: Set up your workspace Keep the image on your desk or screen. Use a second sheet to map the shading so your hand stays steady.
– Step 3: Study light direction Decide where the light comes from. Shade starts light near highlights and grows darker toward shadows. This guides your marks.
– Step 4: Map the shading zones Break the image into light, midtone, and dark areas. Note edges and soft borders. A simple map helps you stay consistent.
– Step 5: Practice with intention Try a small test patch. Compare your result to the reference. Adjust fade and line weight until the feel matches.
Keep practicing with new references. You will see faster progress and steadier shading on real tattoos.
23. Practicing Consistent Hand Pressure

Here is why steady pressure matters. Shading that stays even comes from a calm touch. You can feel it in the slow hum of the machine and in your own breath. If you press too hard or too light, the shade looks patchy. You can fix this with practice and a steady hand.
– Set a steady baseline Grip the machine lightly. Let the weight rest in your forearm. Keep your wrist relaxed. Move the tip with smooth, even pressure. Do not jab the skin.
– Practice on synthetic skin This is your practice field. Use clean, smooth skin and good light. Go slow. Use the same speed for every stroke. If you see dark spots, you pressed too hard.
– Try a pressure map drill Draw a 5 by 5 grid on the skin. Shade each square with the same pressure and pace. Any dark square tells you to adjust the touch. Repeat until all tones look even.
– Watch for edge work Edges stay clean when the pressure stays the same. For softer areas, keep the same pressure but use longer passes. The shade will fade evenly.
– Fix streaks fast If streaks appear, ease up a touch and slow a bit. Recheck with another practice pass.
Next steps: practice daily on synthetic skin, keep notes, and compare results. Your shading gains will show with time.
24. Understanding the Pain Level of Clients

– Before you start, talk about pain and ask the client to rate comfort on a 1 to 10 scale.
– Document that score as your baseline so you can adjust shading pace without guesswork.
– Explain that you will adjust shading to keep them comfortable, even if it means slower progress.
– Some clients need brief breaks; others prefer lighter shading to ease soreness and reduce lingering pain.
– During shading, check in often with a calm voice and clear prompts to help them breathe.
– If the pain score climbs, pause for a short break or switch to lighter shading for a moment.
– Use technique tweaks such as shorter passes, slower speed, and gentler pressure to lower overall discomfort.
– Build depth gradually with multiple light passes instead of one heavy stroke that spikes pain or heat.
– Adjust machine settings and needles carefully, starting with a lower voltage and smaller needle group when needed.
– Keep a damp cloth or cool wipe ready to soothe the skin between passes and calm nerves.
– After the session, note what helped most and what the client would change for next time.
– Use this record to tailor future shading sessions by style, pain tolerance, and preferred break timing.
– This helps you stay consistent.
25. The Art of Blending Colors

– Plan your gradient Start by picking two or three colors that blend well. You should picture light to dark or warm to cool tones.
– Lay a soft base Apply a pale initial layer. You want it light so you can build depth later.
– Build in layers Add a mid tone next. You can feather the edge where colors meet to avoid harsh lines.
– Blend with careful strokes Use small circular motions. Move slowly so the transitions stay smooth.
– Practice on synthetic skin Practice first on synthetic skin. You’ll see how colors mix and fade without harming real skin.
– Mix your own shades On a palette, pre mix gentle transitions. This helps colors stay harmonious in your tattoo.
– Avoid muddy blends Don’t overwork a blend. If it looks dull, pause and add a fresh light layer.
– Edge control Lightly sweep color toward the edge. Clean looks come from careful, steady taps.
– Watercolor shading tips Use thinner ink for soft looks. Dilute slightly to build translucent layers.
– Practical checks Wipe stray ink, keep the surface manageable, and compare with your design.
– Next steps Try a small leaf or petal to test your gradient in a real piece.
26. Exploring Abstract Shading Styles

If you want a fresh look, abstract shading can give your tattoo a modern edge. It stays bold without sticking to strict rules. This style fits both small pieces and larger sleeves.
Abstract shading is loose and expressive. You mix unusual shapes with soft lines and let color or black fade in and out. You decide where edges stay sharp and where they blur. It feels artistic and personal.
Starting points for abstract shading
Here is how to begin with beginners in mind:
– Color splashes: use 2–3 colors. Let them blur into each other at the edges to avoid harsh borders.
– Geometric blocks: add tiny triangles, squares, or circles. Place them to create rhythm and balance.
– Uneven lines: mix thin lines with thicker ones. Let some lines stop short for a relaxed feel.
– Dots and fog: add a soft dot gradient or light stippling for a smoky look.
Practical tech tips
Pick shading needles for good results. A magnum helps fill large areas; a tight liner sharpens edges. Dilute black or color to a gray wash for smoother fades. Always test on practice skin or a stencil first, then adjust pressure and speed.
Next steps
Place abstract shading where it can breathe, such as the forearm or outer shoulder. Keep the area clean during healing and avoid tanning beds.
Here is why this helps you grow: you learn line weight, fade control, and how colors play together.

27. Building a Portfolio

You want clients to trust your shading. A solid portfolio does the talking for you. It shows how you blend grays, how you handle depth, and what your final pieces look like. Here is how to build one that works.
– Choose 8–12 standout pieces that show range: soft gray washes, bold contrasts, stippling, and feather shading.
– Show variety in designs and skin tones so clients see how you adapt.
– Add close-ups of shading details. Let viewers see the fade, the smooth blend, and the dot work.
– Caption briefly each piece. Name the style, the tools used, and one lesson learned.
– Organize online into a clean gallery with sections for gray wash, dotwork, and realism.
– Update regularly as you finish new shading pieces. Keep it fresh and honest.
Photography and display tips
– Shoot in good light. Natural daylight shows true depth.
– Use a plain background and a steady hand or tripod.
– Capture multiple angles and closeups of the shading area.
– Keep color accurate. Adjust white balance if needed.
– Show the big view and the detail in separate photos.
With a strong portfolio, you attract better gigs and steady work. Keep it honest and easy to browse. Next steps: pick your 12 best, plan a photo shoot, and publish a new gallery this week.
28. Staying Updated with Trends

Staying updated with trends
Let’s break it down.
Here is why this matters: trends shape shading choices and help you match client needs.
If you want shading that looks current, you must track what clients are asking for. Trends guide choices, and your style keeps work unique.
– Where to look for ideas – Follow top tattoo artists on social media for quick demos. Watch posts for new shading tricks. Attend local conventions to see live work.
– What to do with new styles – Save designs you like in a Trends folder. Note the shading tricks: soft gradients, dot work, bold fades, color washes. Sketch small versions to test the feel.
– Test shading on practice skin – Use synthetic skin or practice sheets. Try one shading technique at a time. Check photos in daylight and with flash to see how it reads.
– Two solid styles to try – Soft grayscale, micro dot shading, gentle fades, light color washes. Mix these with your own touch so they fit clients.
– Next steps – Pick two trends to explore this month. Create 2-3 mini designs. Talk with clients about adapting ideas.
29. Taking Breaks for Reflection

If you push through shading without a break, small mistakes slip by. Taking a pause helps your eyes reset and your mind compare the tattoo shading to the plan. It also keeps your hands from growing stiff. Here is why breaks are not a waste, they are part of the shading craft.
– Step back and observe. Stand away from the skin. Scan the whole tattoo to see balance between dark and light. Notice how the shading blends from one area to another.
– Check light and angle. Look under the lamp from multiple sides. Small changes in angle show runoff or over-dark spots. Compare shadows along curves to the reference.
– Compare with your reference. Hold the design in your mind. See if your shading matches the chosen style. Ask yourself if the edges feel clean or rough.
– Make small adjustments. Gently press or lift in tiny spots. Use short strokes to soften edges. Recheck after a brief pause to confirm the change helps the whole piece.
– Note your rhythm. Let your hand rest, then resume with steady speed. Consistency matters. Keep a gentle pace and breathe.
Next steps: set a timer for brief breaks after each shading pass. Breathe, sip water, and stretch your shoulders. Keep a simple notebook to log what helped and what felt off so you can improve your tattoo shading over time.
30. Embracing Your Unique Style

You want a tattoo shading style that feels like you. Your shading can set you apart in a crowded field. Start by choosing the vibe you love: soft and dreamy, bold and graphic, or tiny and detailed. Your goal is a voice you can own on every piece. Be honest about what works on real skin and what looks good on paper. Practice on practice skin and tiny designs first.
– Soft gradient shading
Keep transitions smooth. Use light pressure and wipe between strokes. Test 2-4 gray levels on scrap skin; blend slowly.
– Line work and cross-hatching
Bold lines frame shadows. Vary angle and line weight. Cross-hatching adds texture. Practice layering to avoid mushy edges.
– Stippling and dotwork
Dots build depth. Keep dot spacing even. Start dense, then lighten toward highlights. This style shines in small pieces and textures.
Collect textures from photos or real pieces. Create a small notebook with texture swatches. Use this as a quick reference when you sketch. Your pieces get a consistent feel.
Apply to real work. Choose one dominant shading method for a piece. Add a second technique only as an accent. This keeps your style clear and strong.
Next steps. Keep a log of what you try. Refine, not rush. Your unique shading voice will grow with every tattoo, truly.
Conclusion

Exploring tattooing for beginners shading techniques opens up a world of creativity and expression.
By practicing these tips and techniques, you can develop your skills and create beautiful tattoos that resonate with clients.
Remember to embrace your unique style and continue learning as you progress in this exciting art form.
Frequently Asked Questions
What Are the Basic Tattoo Shading Techniques I Should Learn as a Beginner?
As a beginner, it’s essential to grasp the fundamental tattoo shading techniques. Start with whip shading, which creates soft transitions, followed by gradient shading for smooth fades, and finally stippling for textured effects. Each technique has its unique charm and learning them will enhance your tattooing skills significantly!
How Do I Choose the Right Tattoo Needles for Shading?
Choosing the right tattoo needles is crucial for achieving clean shading. For beginners, opt for round shaders or magnum needles as they provide a good balance of coverage and precision. The needle size affects the ink’s distribution under the skin, so experiment with different options to see what works best for your shading style!
What Is the Importance of Using the Right Ink for Tattoo Shading?
The right ink can make a world of difference in your tattoo shading! Look for inks specifically designed for shading, which usually come in light, mid, and dark shades. Using quality shading ink ensures smooth fades and clean shadows, giving your tattoos that polished look. Don’t skimp on this step—it’s worth it for the final outcome!
How Can I Practice Tattoo Shading Techniques Effectively?
Practicing on synthetic skin is a fantastic way to hone your tattoo shading skills without the pressure of a live client. It mimics real skin texture and allows you to experiment with pressure and technique. Additionally, keeping a sketchbook to draft designs and shading ideas can help solidify your understanding of light and shadow in tattoo art.
What Are Some Common Mistakes Beginners Make in Tattoo Shading?
Many beginners tend to overwork the skin by pressing too hard or staying too long on one spot, leading to scarring or uneven shading. Another common mistake is not paying attention to lighting during the process, which can affect how the shading looks. Remember to work slowly, maintain a steady hand, and take breaks to ensure the best results!